Add new WordPress user from Entra / AAD
This guide explains how to manually add a new WordPress user by performing a lookup in Entra ID (Azure Active Directory), directly from WordPress's built-in 'Add New User' page, as shown below.

Before you start
- You have installed and activated the WPO365 | ESSENTIALS plugin or any of the premium bundles that includes the ESSENTIALS feature set.
- To ensure this feature works correctly, administrators must either sign in with Microsoft using OpenID Connect-based single sign-on, or WPO365 must be granted application-level access to Microsoft Graph with the User.Read.All permission.
- You are an Administrator for your WordPress website.
|
Note that this feature focuses on manually adding a new WordPress user by performing a lookup in Entra ID (formerly Azure Active Directory). WPO365 also offers several automated user enrollment options, such as bulk synchronizing users from Entra ID to WordPress or integrating with Entra ID’s SCIM-based Application Provisioning Service. |
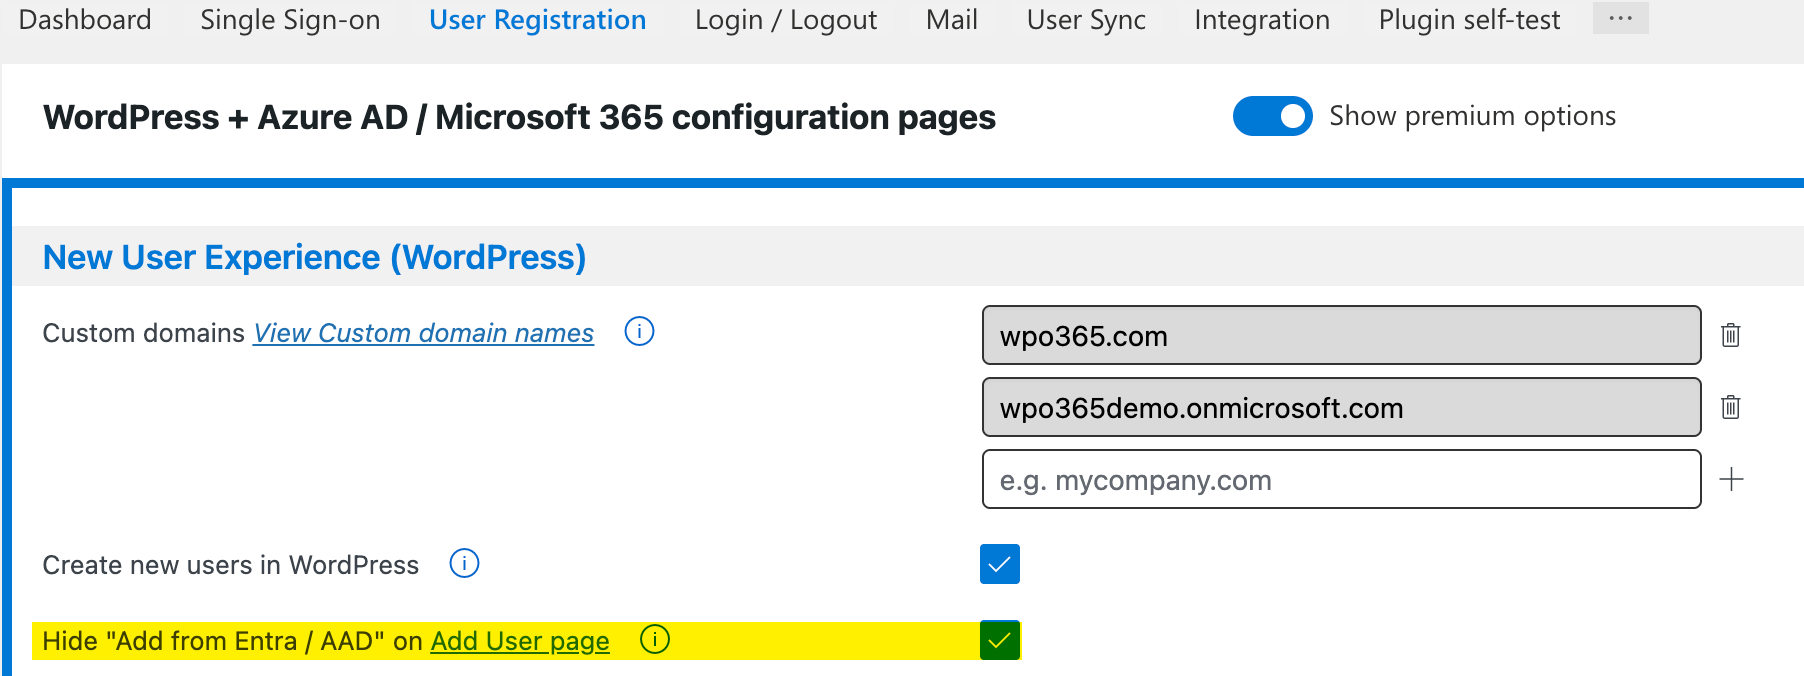
Show / Hide "Add from Entra / AAD" button
To show or hide the Add from Entra / AAD button on WordPress's built-in "Add User" page, you can check the corresponding option on the plugin's User Registration configuration page, as shown below.
 Perform search and add a new WP user
 Perform search and add a new WP user
To manually add a user from Entra ID (previously Azure Active Directory), perform the following steps.
- Navigate to WP Admin > Users > Add user.
- Click the Add from Entra / AAD button next to the header Add User. Refer to the Before you start section above, in case the button is not visible.
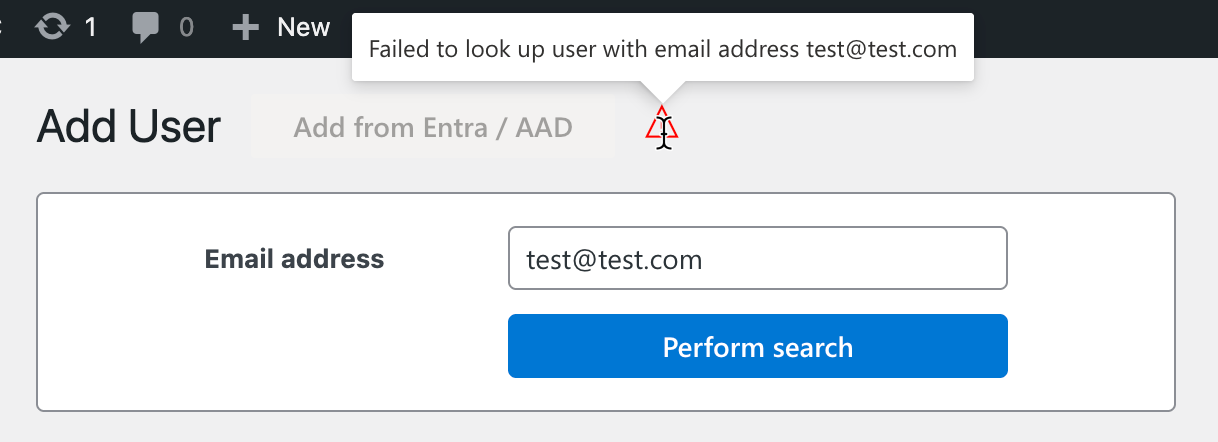
- Once you click the button, the user lookup feature will appear (see screenshot at the top of this article).
- Enter the email address of the user that you wish to add and click Perform search.
- If a user is found, they will appear next to Result with an Add badge. Clicking the result will automatically populate the fields in the built-in WordPress form below. See the section Configure mappings below, for instructions how you can change how those fields are populated or how to auto-fill custom fields.
- After the built-in fields are populated, simply click the Add User button. If no user is found, or if an error occurs during the search, a red warning will appear next to the now-disabled button. Hovering over the icon will display the error message.
 Configure mappings
 Configure mappings
Perform the following steps to change how the built-in WordPress fields on the Add User page are populated.
- Click the gear icon next to Add from Entra / AAD button. Now the Settings page will appear, as shown below.

- Use the form to update the current mapping between the form fields - selected using CSS selectors - and the corresponding Microsoft Graph User resource properties they should be populated with. Click here for a list of all available properties.
- To add a new row, click the corresponding button. To edit a row, click the Edit button. When a row is editable, it can be updated and saved by clicking the Save button. Alternatively, you can delete the row.
|
Please note that if you choose beta as your Microsoft Graph version, you'll get access to more detailed data. You can change this setting on WPO365's Integration configuration page. |