SSO | OpenID Connect - Auth.-Code flow
Preview notice
We are working hard on a new WPO365 tutorials site and we are very happy to invite you to visit instead the tutorial to configure OpenID Connect based single sign-on.
Before you start
Use this guide to configure Microsoft Azure AD based Single Sign-on using OpenID Connect's Authorization Code Flow when you have installed the WPO365 | LOGIN plugin. Make sure to also view the video for this guide: https://youtu.be/6ti71O4nh0s.
- You have reviewed the installation prerequisites and have installed and activated the plugin (see Getting started - Installation).
- You are a Global Administrator for your company’s Office 365 tenant / Azure AD directory (or have at least the ability to register new applications).
- You are an Administrator for your WordPress website.
- Your website uses SSL and the internet address starts with https://.
The only exception is when you host your (development) website on 'localhost'. This restriction is enforced by Microsoft to protect oauth / ID tokens being exchanged between the Azure Active Directory endpoint and your website.
Register your WordPress website in Azure AD
To configure Microsoft OpenID Connect based Single Sign-on, start by registering your WordPress website in Azure AD.
- In Azure Portal click the 'hamburger' (icon with three horizontal lines in the upper corner) to open the menu.
- Navigate to Azure Active Directory > App registrations.
- Click + New registration.

- Enter a Name that helps you remember what application you are currently registering e.g. App registration for App registration for https://wpo365connect.com/.
- Scroll down to Supported account types and select Accounts in this organizational directory only *.
- Scroll down to Redirect URI and select Web from the platform dropdown list.
- Switch to a new browser tab and go to WP Admin > WPO365 and continue to the plugin’s Single Sign-on configuration page and copy the automatically proposed Redirect URI (this should be equal to your website's home address).
- Click Register.
* Please have a look at this article if your want to allow accounts in any (instead of in this) Azure AD tenant to sign into your WordPress website.
ID Token configuration
OpenID Connect based Single Sign-on will allow the plugin to request an ID token for a user that successfully authenticated with Microsoft. Perform the following steps to configure some of the fields (so-called claims) of the ID token.
- Click Token configuration from the App registration's menu on the left.

- Click + Add optional claim.
- Select ID.
- From the list check the following options
- family_name
- given_name
- upn
- Click Add.
- If you are asked to add the email and profile permissions required for these fields to be sent in the ID Token then confirm by clicking yes (see the next step).
API Permissions
The OpenID Connect Authorization Code User Flow starts by sending a user to Microsoft to authorize the retrieval of an Authorization Code. This Authorization Code is then sent back to the browser and from the browser forwarded to the server where the plugin will receive it. The Authorization Code allows the plugin to request an ID token on behalf of the logged-in user but only if the administrator has configured the corresponding API Permissions. This implies that oauth Access and ID tokens that are obtained this way will never be sent to the client / browser. Therefore this user flow is considered more secure than its alternatives (the Hybrid User Flow and the Implicit User Flow).
Perform the following steps to grant Azure AD permissions to send an ID Token (and in it a minimal set of user attributes) requested by the plugin on behalf of the logged-in user.
- Click API permissions from the App registration menu on the left

- Click + Add permission.
- Select Microsoft Graph > Delegated permissions and check *
- offline_access *
- openid
- profile
-
Click Add permissions.
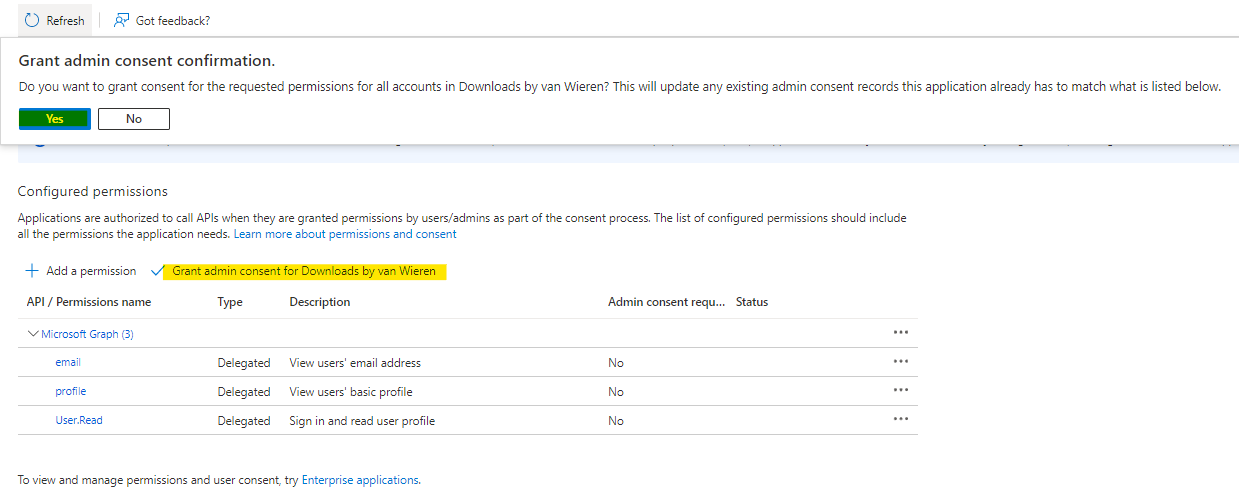
-
Wait until Grant admin consent for … has become available **, then click to grant consent for all users in your tenant to use this App registration and its ability to provide ID tokens (and Access Tokens).
* If you plan advanced integration and embedding of Microsoft 365 services in WordPress then you probably need to add additional permissions on this page. Please consult the integration guide for Microsoft 365 services for in-dept guidance.
** If the Grand admin consent for ... is greyed out then you do not have sufficient permissions to continue. Since this is mandatory you must contact your Global Administrator and ask for help.
Certificates & Secrets
Since the Authorization Code User Flow is a server-based flow you must configure an Application (Client) Secret for the application that you are registering. Think of the application as a user (the App Principal) and of the secret as the user's password. With this secret the plugin can request to exchange the Authorization Code that the user initially received when he / she logged in with Microsoft for an ID and / or Access Token.
Perform the following steps to create an application client secret.
- Click Certificates & Secrets from the App registration menu on the left.

- Click + New client secret.
- Optionally you can give the new secret a Description that helps you remember it later and choose an expiry date e.g. 6 Months *.

- Copy the secret's Value (not its ID) ** and temporarily paste it in a text file. You won’t be able to retrieve it later.
* Once a password expires, it cannot be used and the plugin will fail to retrieve tokens. Therefore you must renew this password right before it expires and update the plugin's configuration accordingly (see next step).
** Make sure to copy the value and not the Secret ID. You wouldn't be the first!
Configure the plugin
Perform the following steps to update the plugin's Azure AD configuration with the values created in the previous steps.
- Open WP Admin > WPO365 > Single Sign-on in one browser tab / window.
- Ensure that Single Sign-on is enabled.
- From the dropdown Select Identity Provider (IdP) select Azure AD (default). If you want to configure integration for Azure AD B2C then please follow the steps in the Azure AD B2C guide instead.
- From the dropdown Select SSO-protocol select OpenID Connect (default) unless you need to configure SAML 2.0. In that case please follow the steps in SAML guide instead.
- From the dropdown Select OpenID Connect flow select Auth.-code Flow (default) unless you have a good reason to configure the Hybrid Flow instead.
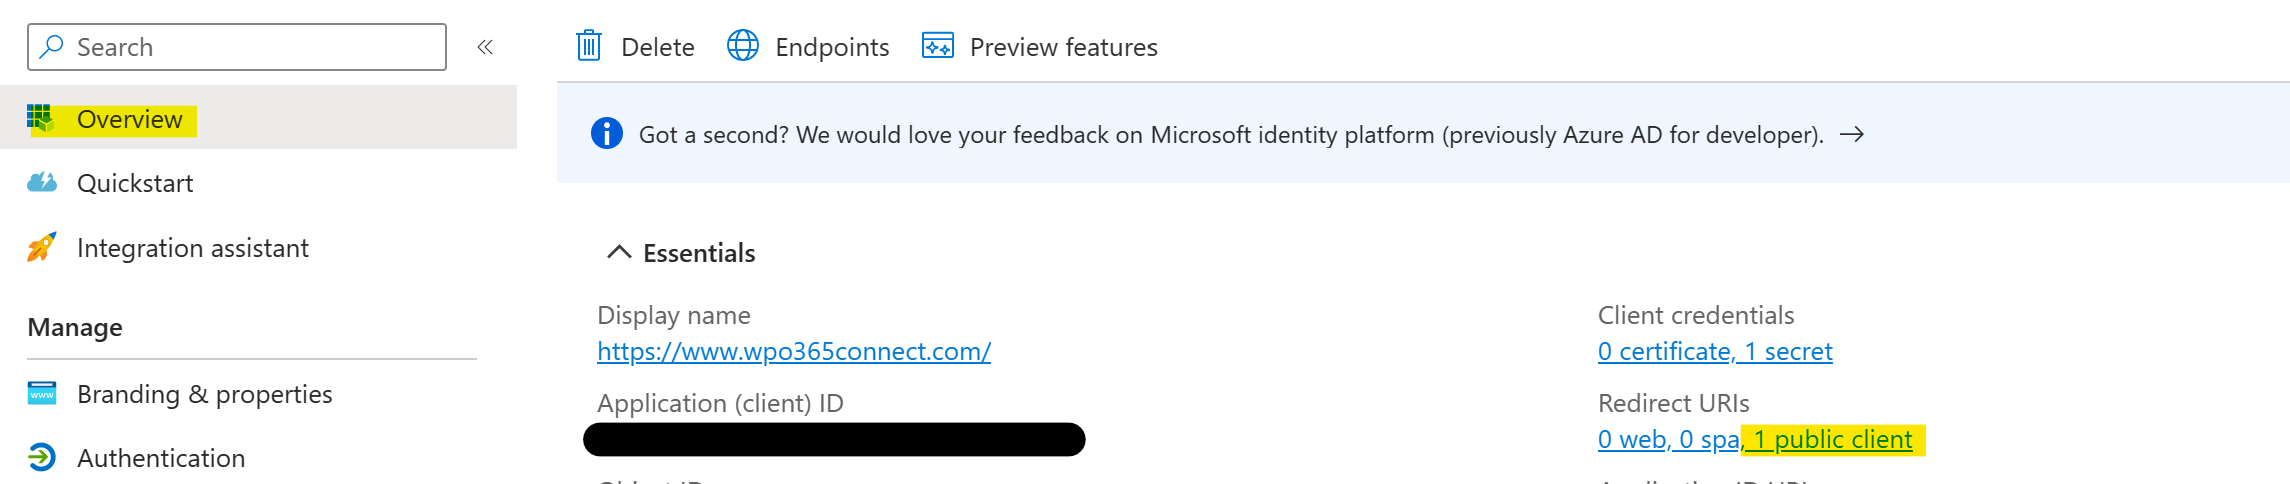
- Now open in a new browser tab Azure Portal navigate to the application registration’s Overview page and copy the Directory (Tenant) ID and paste it into the corresponding field on the plugin’s Single Sign-on configuration page.
- Repeat the previous step and copy the Application (Client) ID from the Overview page and paste it into the corresponding field on the plugin’s Single Sign-on configuration page.
- Copy the Application Client Secret from the text file where you temporarily saved it.
- Select your desired Authentication scenario. Please note that you can use the Intranet Authentication scenario to require users to sign in before they can access your website's front-end posts and pages
- Do not enter a Domain hint at this point in time. You can add a Domain hint later when users complain that Microsoft signed them in with the wrong account (this can happen if a user is signed in with multiple tenants).

- Scroll to the bottom of the plugin configuration page and click to Save configuration. A popup window will open and you’re reminded to optionally clear server-side cache. When you click Confirm the Plugin self-test will load but you can ignore this for the moment.
- Instead continue to the plugin's User registration page and click the link View custom domain names just before to the Custom domains field (this will open a new tab).

- Now copy each domain name that is used as the domain portion of Azure AD users and add it to the list of Custom domains. Make sure to click + after each domain name added.
- Scroll to the bottom of the plugin configuration page and click to Save configuration.
Test the configuration
Perform the following steps to self-test the plugin.
- Go to the plugin's Plugin self-test.

- Click Start self-test to check the current configuration and the plugin’s ability to retrieve an ID token (and optionally an access token).
Please note As soon as the self-test is starting, the ‘Test mode’ will be activated. During this time the plugin is not protecting your website. The plugin will now try and sign in using Microsoft and you may be prompted by Microsoft to sign in.
Important Please be aware that at no time your authentication input will be shared with (y)our website and / or the plugin: All information you enter is only shared with Microsoft at all times!
- Once the self-test is finished (during the self-test the page may be reloaded) you will see the test results. You can click on each entry in the list to view the full details incl. category, severity and a proposed resolution to fix the issue.
- To inspect the ID Token that has been sent by Azure AD to your website, you must scroll down to the test case Can decode the ID token and click View.
Please note The plugin has many premium features that are not enabled by default and that can only be enabled if you have purchased one of the premium extensions or bundles. The Plugin self-test will show test cases for those features as failed when no extension or bundle was found capable of enabling the features.
Mapping between Azure AD and WordPress users
Whenever an Azure AD user signs into WordPress, the plugin will retrieve an ID Token. It will use the information in the ID Token to find a WordPress user with a matching username (1st attempt) or with a matching email address (2nd attempt). If no user is found, it will create a new WordPress user with the same username as the Azure AD / Microsoft 365 username.
Please note The free plugin WPO365 | LOGIN will only create a user but not populate that user's email address, first. last and display name. If you need these fields to be filled out automatically, then please have a look at the available premium extensions and bundles.
Perform the following steps to disable the automatic creation of new users.
- Go to WP Admin > WPO365 > User registration.
- Uncheck the option Create new users.
- Scroll to the bottom of the page and click to Save configuration.
If you want to manually create a WordPress (test) user to match with a user that signs in with Microsoft then configure that user so that:
- The WordPress user's username matches that user's Azure AD / Office 365 username e.g. 'john.doe@your-tenant.onmicrosoft.com' or 'john.doe@custom-domain.com'.
- And / or the WordPress user's email address matches your user's Azure AD / Office 365 email e.g. 'john.doe@custom-domain.com' (note that often Office 365 / Azure AD login names and their email addresses are the same).
Troubleshooting
You receive "AADSTS700025: Client is public so neither 'client_assertion' nor 'client_secret' should be presented"
You will see this error if you configured your App registration in Azure AD to support a public client application such as a mobile or desktop application. Navigate to the plugin's Single Sign-on configuration page, scroll down to the setting for the Application (client) ID and click the View in Azure Portal link. This will take you to the application that you registered in Azure AD for your WordPress website. Here you can check on the application's Overview page whether you have - by accident - configured a public application instead of a confidential client (this Microsoft article does provide some additional background information).
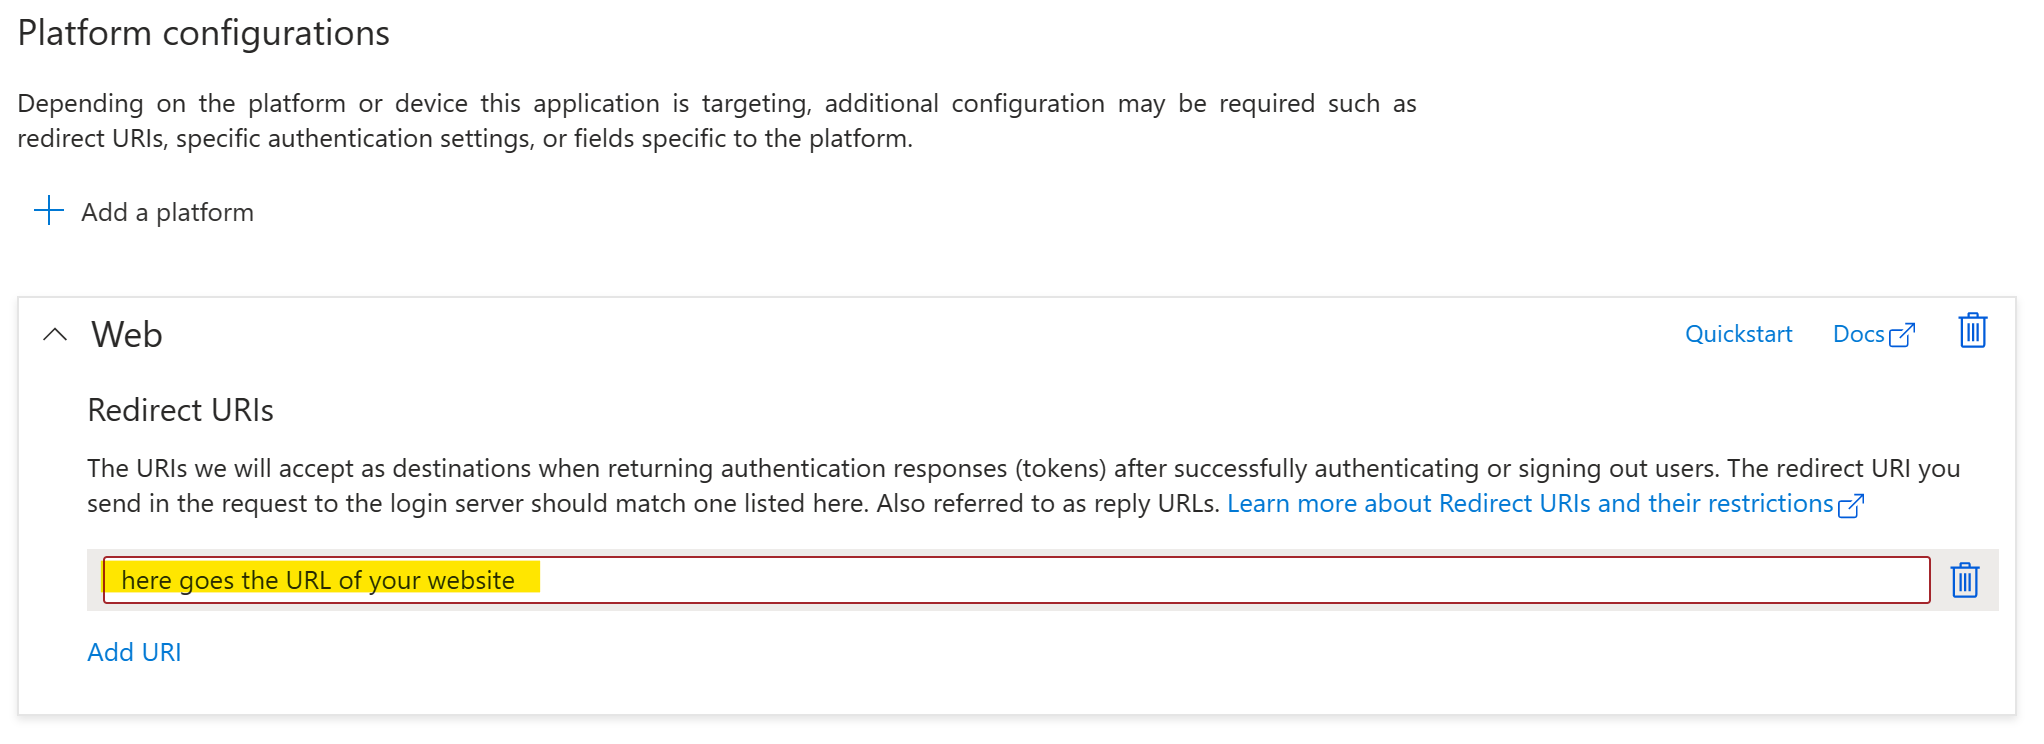
To correct this, please go the App registration's Authentication page, remove all platforms and click + Add platform and make sure to add a new Web application.
 Now add your website's homepage URL as Redirect URI and make sure that the URL that you enter here is exactly the same as the URL entered as Redirect URI on the plugin's Single Sign-on page, or else Microsoft will refuse to authenticate a user and show an error instead.